
Use Power Automate to Make Sharing to LinkedIn (and Other Places) a Breeze
It’s such a chore to have to find interesting things to post to LinkedIn so I can stay relevant with all my connections! If I don’t post anything, how will my followers know I still exist? What if I told you that you didn’t have to doom scroll through your RSS reader to find interesting articles to share—you could automatically be asked if you wanted to post your favorites?
Even though a full-on J.A.R.V.I.S. might still be a little way off, you can unleash Power Automate to tackle this tedious task for you. Power Automate, or Flow, is part of most Microsoft 365 licenses. So, head on over to flow.microsoft.com with me and let’s see how we can use Power Automate to make sharing to LinkedIn super easy, with just a little work up front.
Create a new Automated Cloud Flow
In Power Automate, click + Create in the left navigation and select Automated cloud flow under the Start from blank section at the top.
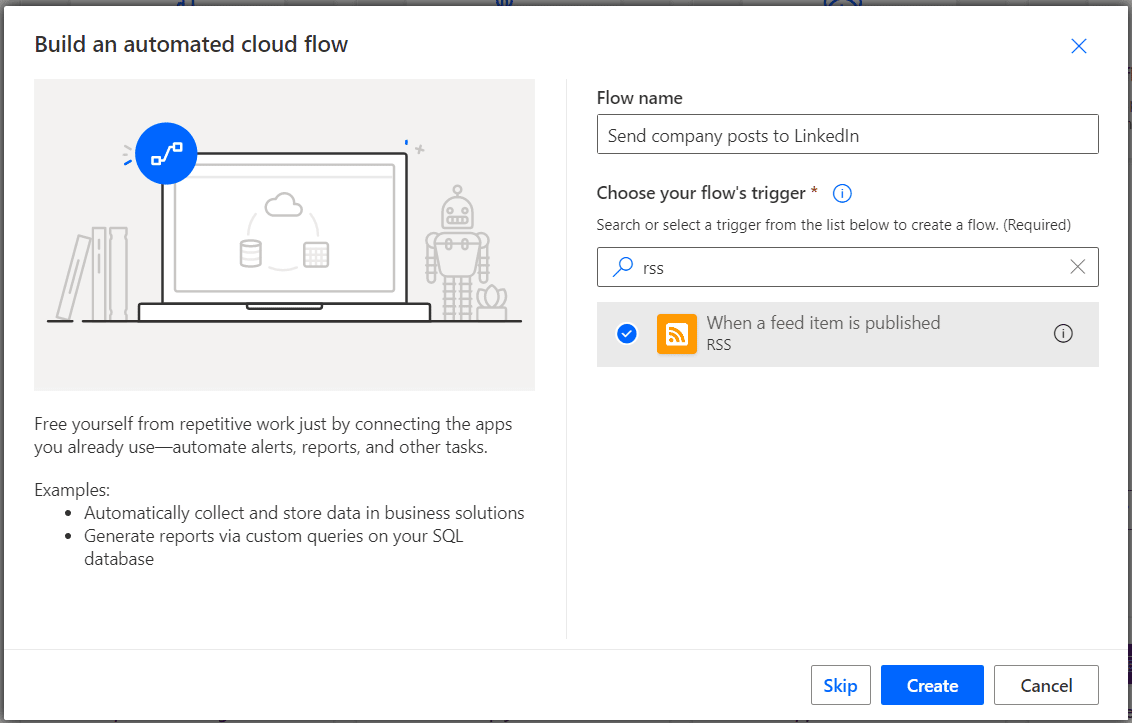
Enter a name for your flow and search for the correct trigger by typing RSS in the search field. Select When a feed item is published and click Create.
Configure the trigger
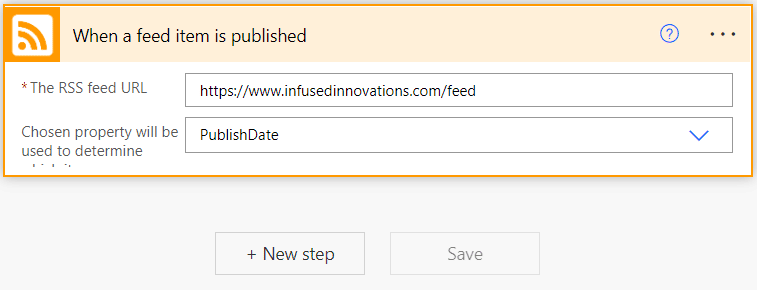
Enter the RSS feed URL in the card and ensure PublishDate is how the flow will trigger.
Time to create the magic
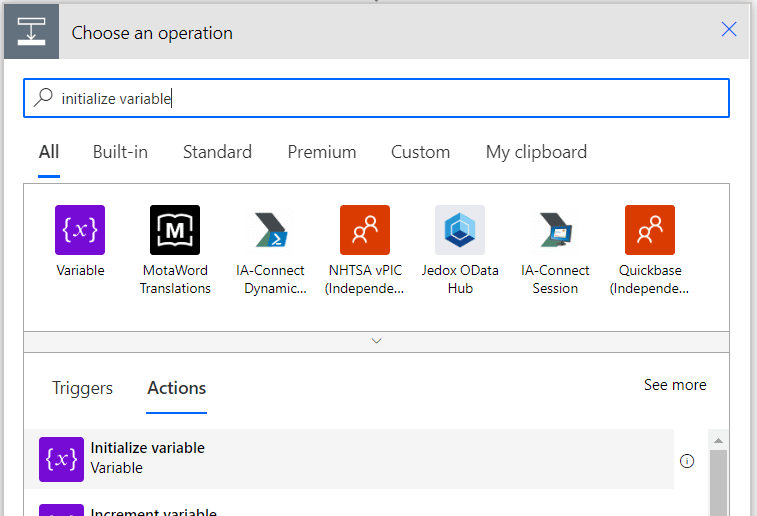
First, we should set a variable with your email address, which will be used when sending the card to Teams. Using variables is a great approach because it allows you to easily change who to send this to without having to dig down in the other steps. To do this, click + New step, type initialize variable, and then select the Initialize variable action.
To make each step clearer, I recommend renaming them to something easy to remember. Click the three ellipses on the right side of the card and select Rename. In this case, I will rename it to User email address to send Teams Adaptive Card to via Chat. I’ll be renaming other steps along the way, but not necessarily noting them in the instructions, since the names are up to you.

Now it’s time to set the variable. For this flow, I’ll set the name to UserEmail, the type to String, and enter my email address as the value.

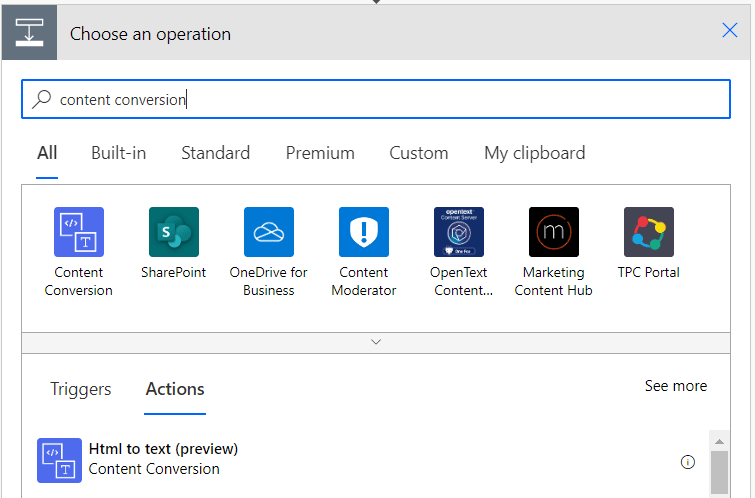
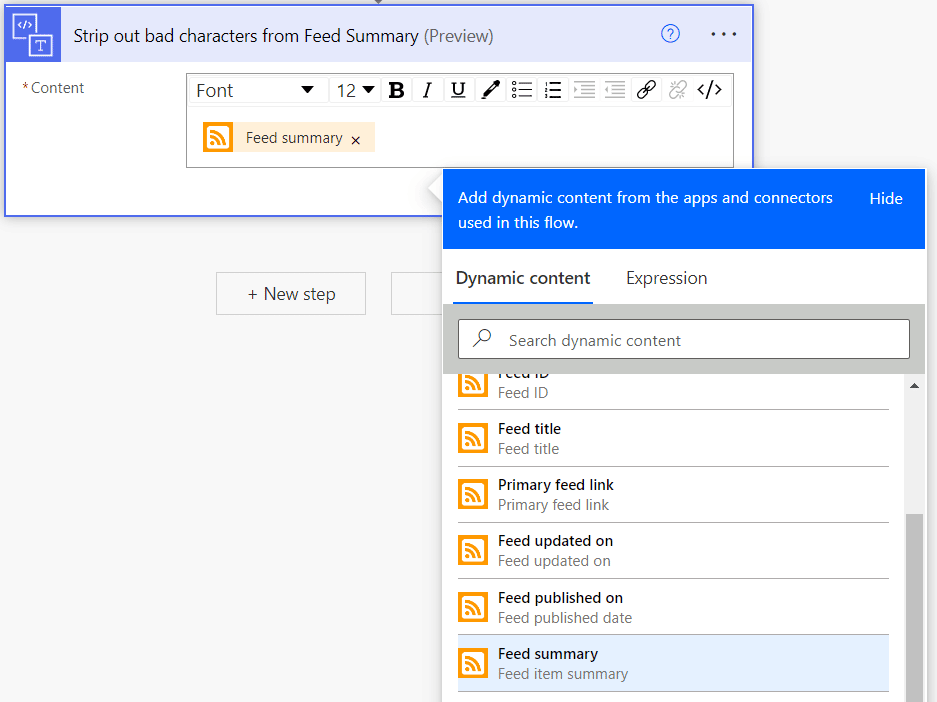
Before we start passing text between all the steps, we first need to do a little cleanup. All the HTML code that can be buried in RSS feed can cause some display issues in the Adaptive card. Rather than trying to correct it all, it is simpler to just strip out all the code and leave yourself with plain text. Remember, this is a quick display for you only, so it doesn’t have to be fancy! For this next step, search for content conversion and select the Html to text option, in preview as of this writing.
In the content section of this step, we need to select the Feed summary variable from the RSS feed. This is dynamic content from the initial trigger step. When you click in the text box, you will be presented with an option to select the Feed summary dynamic content variable.
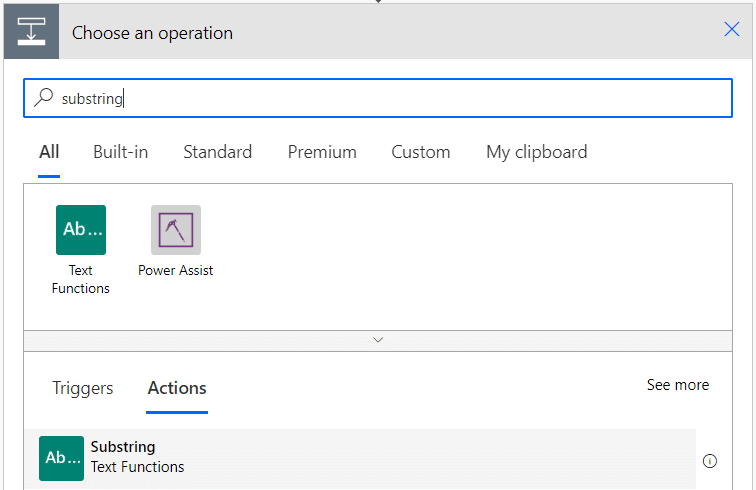
 Since I don’t need to see a whole lot of the content of the post in the Adaptive Card, I like to truncate the summary down to around 200 characters. To do that, we will use the Substring text function.
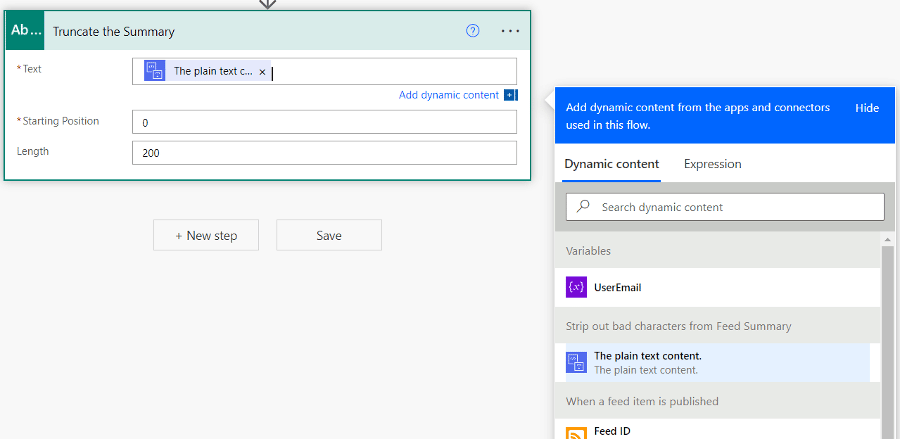
This is where you will see the value of renaming steps. I now want to set the maximum length of the RSS feed summary to 200 characters. However, I don’t want to select the original feed summary. In this case, I want to select the plain text from the previous step where I stripped out all the HTML code.
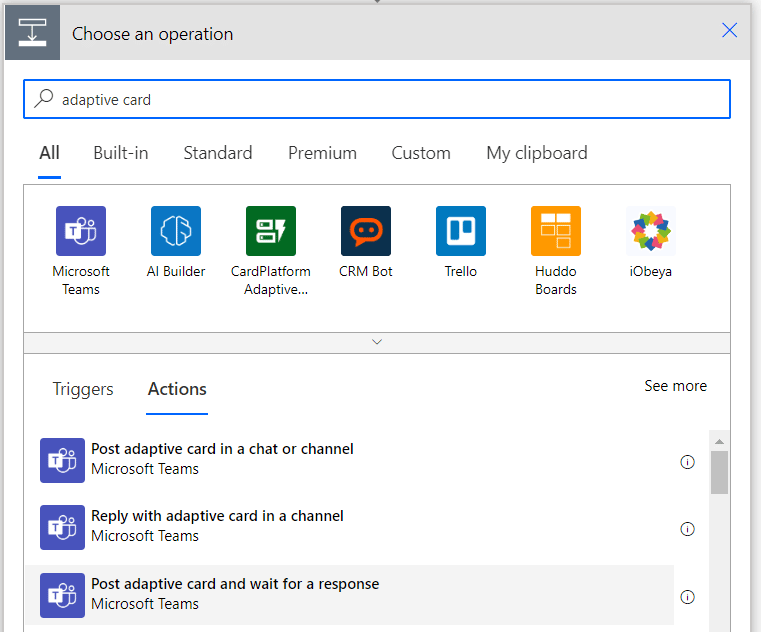
 Here’s where the rubber hits the road and we actually post something to Teams. Search for adaptive card and select the Post adaptive card and wait for a response option.
Be sure to rename this step to Card. Trust me, it’ll make it easier later!
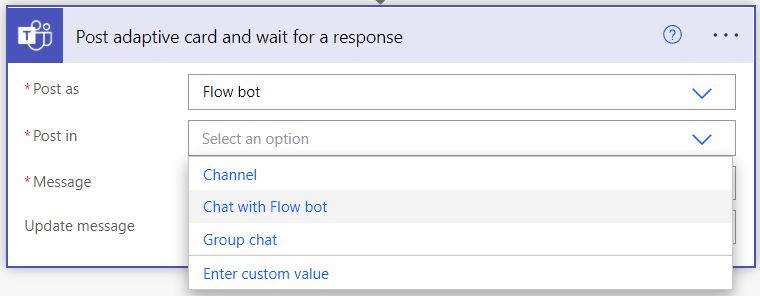
Since we want this process to take place via a chat, set the Post as to Flow bot and post it in the Chat with Flow bot.
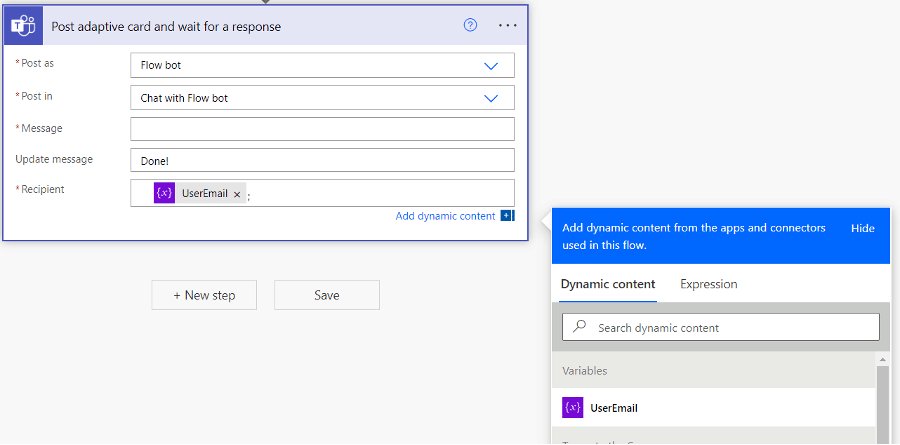
Next, we need to set you as the recipient by selecting the variable from earlier in the flow. Again, you do not have to use a variable. However, I do find it easier to isolate it from the rest of the flow. I also changed the Update message to Done.
 Then you need to paste in the JSON code for the structure of the Adaptive Card in the message field. This is where you have a little flexibility in how you want it to display. To create the code, you can use Adaptive Card Designer to build it…then you just copy and paste it into this step and swap out a few variables along the way. Here is the code I used, with the variables I inserted highlighted in red:
{
“type”: “AdaptiveCard”,
“body”: [
{
“type”: “TextBlock”,
“size”: “Large”,
“weight”: “Bolder”,
“text”: “New Blog Post”,
“color”: “Accent”
},
{
“type”: “TextBlock”,
“text”: “@{triggerOutputs()?[‘body/title’]}”,
“wrap”: true,
“id”: “<FEED TITLE VARIABLE FROM RSS FEED>“,
“size”: “Medium”,
“weight”: “Bolder”
},
{
“type”: “TextBlock”,
“text”: “<SUBSTRING OF TRUNCATED TEXT>…”,
“wrap”: true,
“horizontalAlignment”: “Left”,
“fontType”: “Default”,
“size”: “Default”,
“weight”: “Default”,
“color”: “Default”
},
{
“type”: “ActionSet”,
“actions”: [
{
“type”: “Action.OpenUrl”,
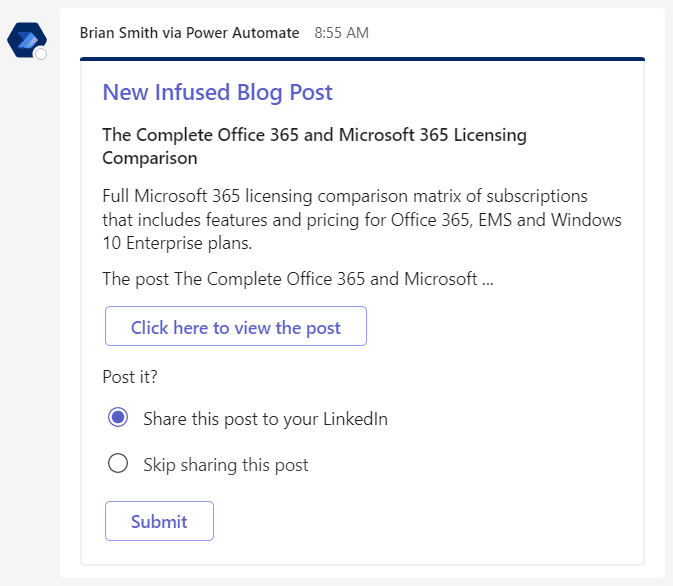
“title”: “Click here to view the post”,
“url”: “<PRIMARY FEED LINK FROM RSS FEED>“
}
]
},
{
“type”: “Input.ChoiceSet”,
“choices”: [
{
“title”: “Share this post to your LinkedIn”,
“value”: “Share”
},
{
“title”: “Skip sharing this post”,
“value”: “Skip”
}
],
“placeholder”: “Select”,
“label”: “Post it?”,
“style”: “expanded”,
“id”: “ChoiceSelection”
},
{
“type”: “ActionSet”,
“actions”: [
{
“type”: “Action.Submit”,
“title”: “Submit”,
“associatedInputs”: “auto”
},
]
}
],
“$schema”: “http://adaptivecards.io/schemas/adaptive-card.json”,
“version”: “1.3”,
“id”: “BlogPost”
}
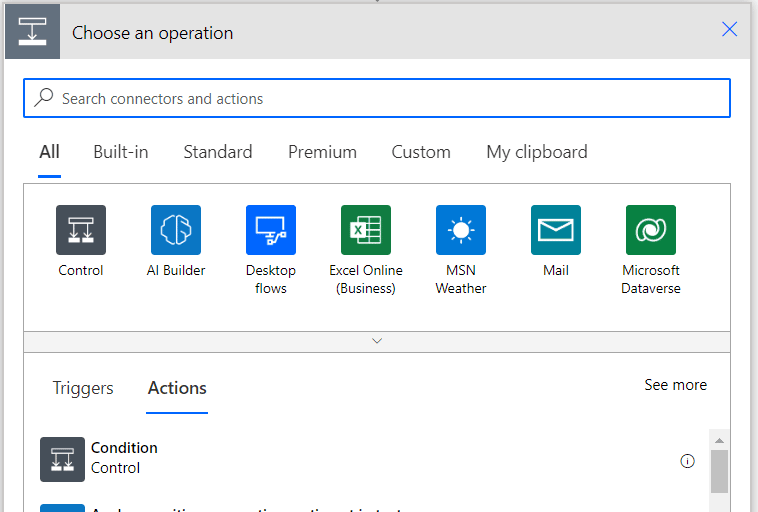
Now that we have the Adaptive card setup with choice selections of Share or Skip, it’s time to add a Control Condition step. This is the yes/no, A/B, red pill/blue pill step of the process to tell Power Automate what you want to do with this post.
We are looking for the selection output from the card. So, there’s a little expression magic to capture that:
outputs(‘Card’)?[‘body/data/choiceSelection’]
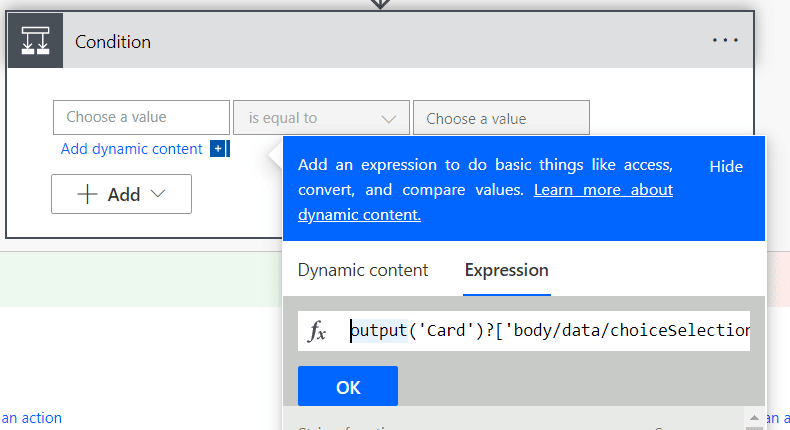
In the case of this card, the Boolean yes/no we are looking for is Share for the yes. The assumption will be that if it is not Share, it is a “no.” So, set the value equal to Share.

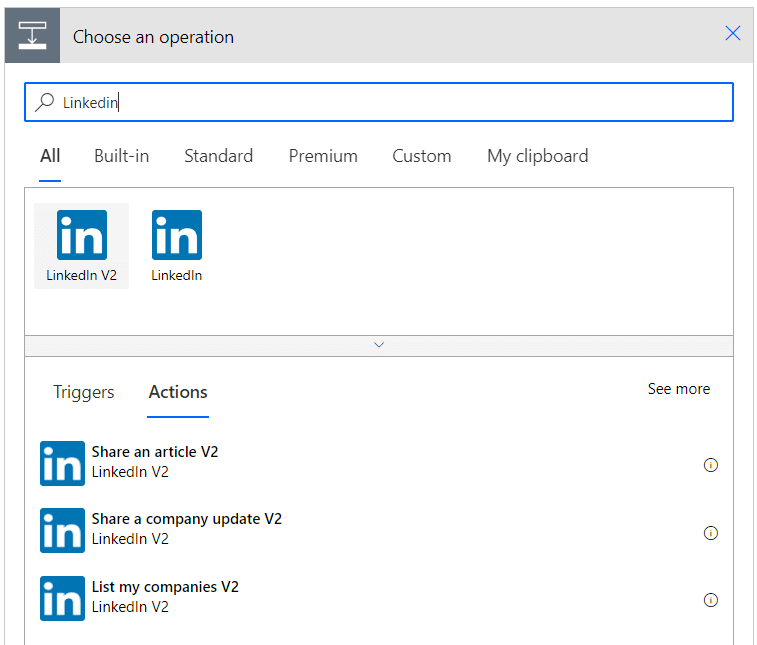
Now, let’s edit the Yes (or Share) side of the condition. We are finally at the stage to share it to LinkedIn. Search for LinkedIn and select the V2 (as of this writing) option. Then select Share an article V2.
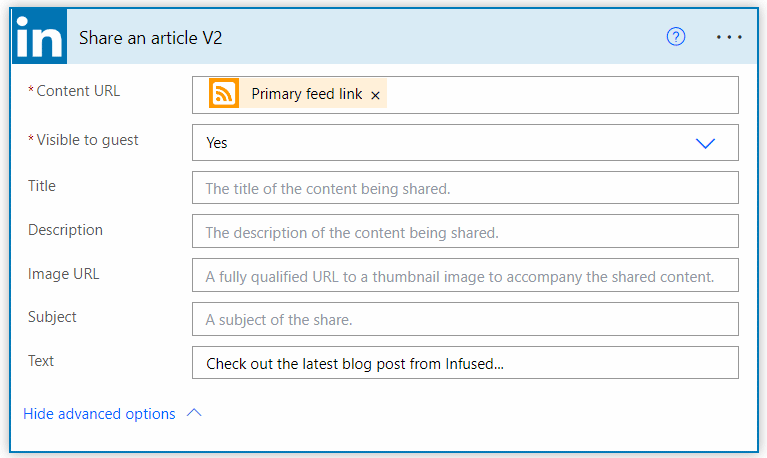
 Go through the steps to sign in to LinkedIn when you add the step. We need show the advanced options if you want to add text when sharing the link. In this case, the Content URL will be the Primary feel link from the initial trigger step. Of course, you want it to be visible, so select Yes to be Visible to guest. And, in my case, I added some text to introduce the link I’m posting in the Text field. Leaving the other fields blank will allow LinkedIn to pull them from the URL itself, which is a much better looking way to post the link.
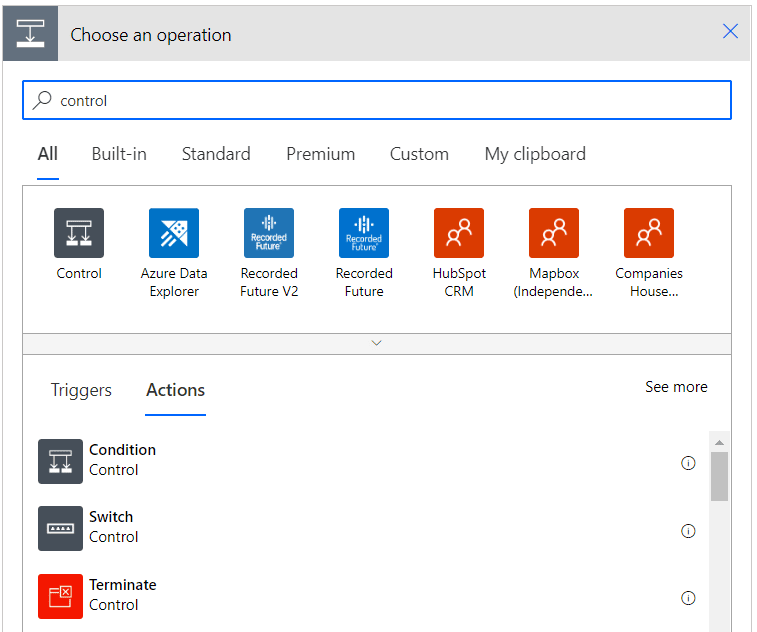
We aren’t quite done yet, since we need to tell the workflow what to do if you say you don’t want to share the post…and it couldn’t be any easier. Select the Control step called Terminate with the option succeeded selected.
And that’s how you use Power Automate to make sharing to LinkedIn easy-peasy!
You can now take off your programmer’s hat and wait for the next post to the website to go live. If you got everything correct, you’ll receive an adaptive card in a chat that looks something like this:
 It’s also now SUPER easy to create flows for other RSS feeds. Just simply make a copy of this flow and change the RSS feed URL in the very first trigger step.
You are now on autopilot when it comes to posting interesting articles to your LinkedIn news feed. If you’re feeling daring, I challenge you to make a version of this workflow that will send the article to your Twitter feed. There’s a Twitter action in Power Automate, so just swap it out. Or maybe you want to post it to a channel in Teams somewhere. Are you already envisioning how you could automatically post everything to a channel (or anywhere) if you take out the last two steps so it doesn’t ask you anything? Now you’re catching on to the possibilities. Microsoft also adds new actions to Power Automate on a regular basis, so keep an eye out for something interesting to do next!
–
More by Brian Smith:
